
Hello everyone! This tutorial will guide you on how to use Arduino as a beginner right from the very basics.
Introduction
Let`s have a short introduction of what actually Arduino is,
The Arduino board was created at the Ivrea Interaction Design Institute for students with no prior knowledge of electronics or programming.
Arduino is a microcontroller-based prototyping board that is open source, which means anyone in world can create a clone with the name of Arduino. Arduino boards comes in different variants and models. There are a lot of helpful videos on YouTube regarding Arduino that you can watch.
Download all resource files for Arduino Programming Course: https://drive.google.com/drive/folders/11MYTnf5k2kf3li389vJxB3lWvime8azC?usp=drive_link
Now discuss few variants of Arduino first available in the market:
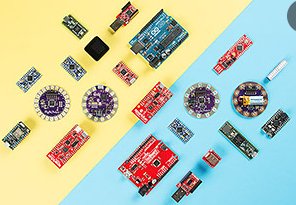
Different Types of Arduino Boards
The list of Arduino boards includes the following such as
- Arduino Uno (R3)
- Arduino Nano
- Arduino Due
- LilyPad Arduino Board
- Arduino Micro
- Arduino Leonardo Board
- Arduino Esplora
- Arduino Pro Mic
- Arduino Ethernet
- Arduino Robot
- Arduino Bluetooth
- Arduino Diecimila
- RedBoard Arduino Board
- Arduino Mega (R3) Board
- Arduino Zero
- Fastest Arduino Board
Details about each and every board are mentioned here at https://www.elprocus.com/different-types-of-arduino-boards/
You can have information regarding each and every variant from this page, lets discuss some of the common boards that you can use.
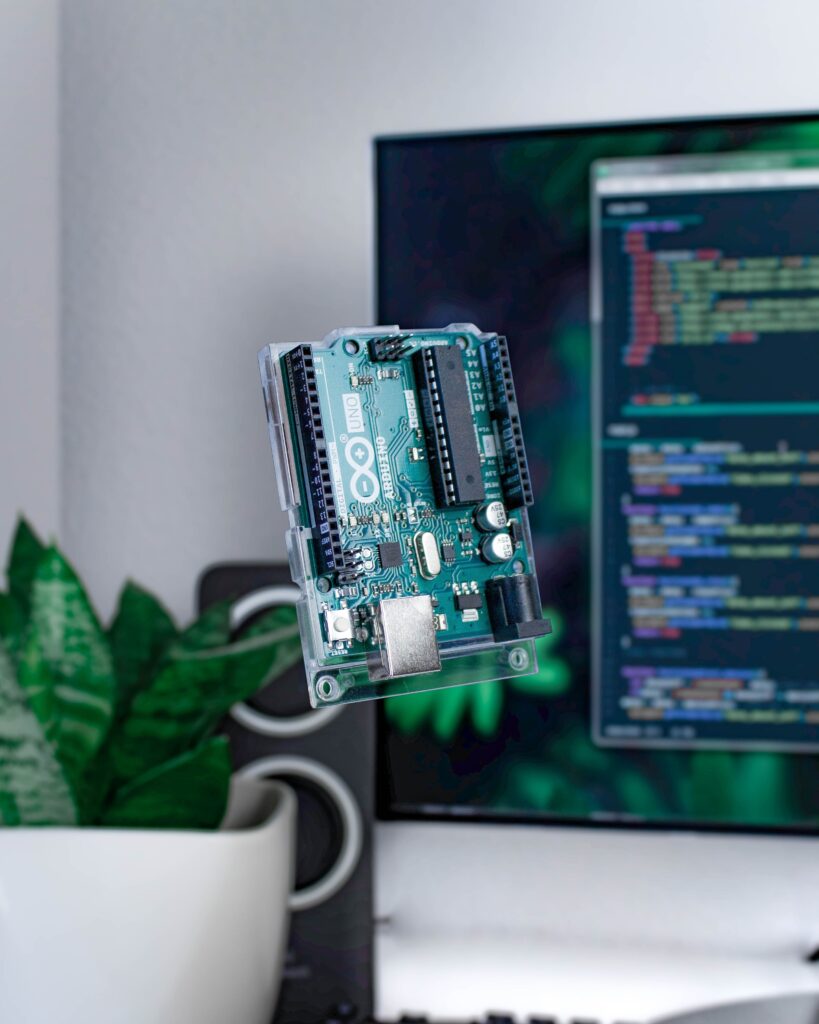
Arduino UNO:
With 2kb SRAM and 32KB flash, It’s just like the Arduino Mega type board in terms of ease of usage. It has 14 digital I/O pins (six of which can be used as PWM outputs), six analogue inputs, a reset button, a power jack, a USB connection, and an In-Circuit Serial Programming header (ICSP), among other things.
There are pins on both sides of the Arduino, some are analog some are digital, we name them like pin 1 or D1 as digital pin 1 on bottom left of the Arduino, similarly, we have power pins like GND 5V VIN etc. To learn more about arduino pins you can visit:
Arduino also has pins for SPI and I2C Communication, we can connect any module or device that communicates with these protocols, like memory card module and OLED LED, pin number 9 to 13 are assigned for SPI communication while A4 and A5 are used for I2C Communication.
So all this was the introduction of Arduino, Now it is time to learn Arduino Software.
Software
Now to start working with Arduino the first thing that we need is software, you can simply download Arduino IDE free from its official website here
https://www.arduino.cc/en/software/
Now here is the default interface of Arduino software:
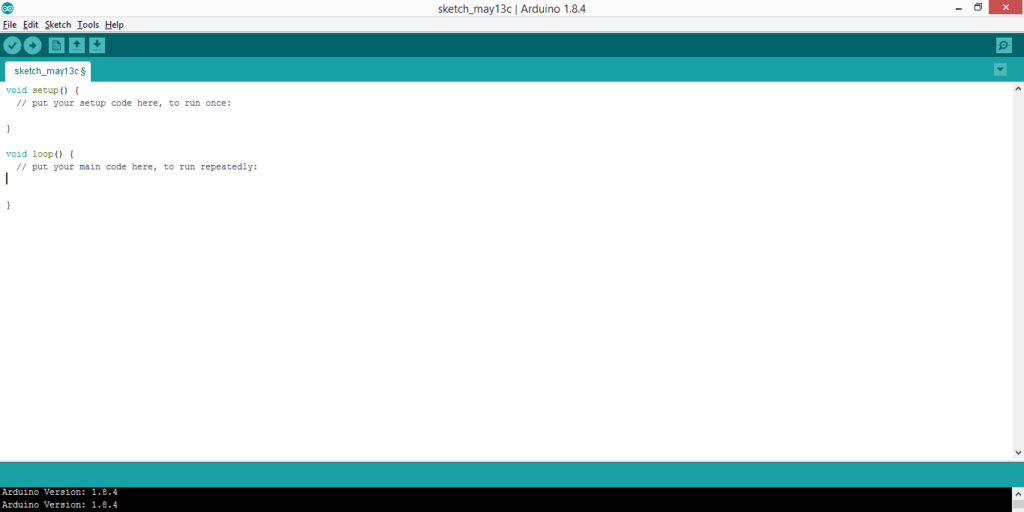
You can write your program directly on this empty white space, the syntax that we use is generally C and Java mixture, but essentially if you know C language you will not have trouble programming the Arduino board.
By default, there are two functions in the Arduino program
Setup and Loop
Anything we write in the setup will execute once when we power our Arduino every time.
Anything we write in loop will keep running again and again until Arduino is on, so lets suppose we want to run our motor continuously, we send a pulse to motor in loop function and it will keep getting that pulse again and again till Arduino is ON.
With that introduction done lets start our first project.
LED blinking
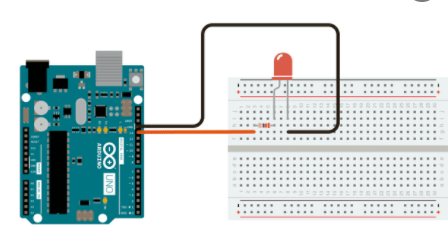
To create your first project you need a breadboard, 1 LED, few wires and an Arduino.
Connect LED with Arduino directly just for this project (later you should add a resistor) Here is a basic circuit diagram
LEDs have 2 terminals (Light emitting diodes), connect positive terminal with Pin 13 of Arduino. Connect negative terminal with GND pin of Arduino.
Now to program it simply take and example program from your Arduino IDE.
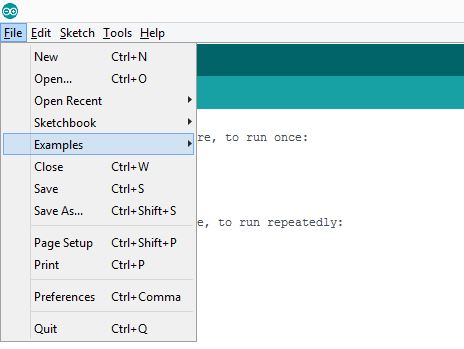
Go to file -> Examlples -> Basics -> Blink
Here is basic blink code copied from Arduino Compiler, you can copy this one as well
Code LED Blinking
void setup() {
// initialize digit al pin LED_BUILTIN as an output.
pinMode(LED_BUILTIN, OUTPUT);
//Serial.begin ( 9600);
}
// the loop function runs over and over again forever
void loop() {
//Serial.println(“abc”);
digitalWrite(LED_BUILTIN, HIGH); // turn the LED on (HIGH is the voltage
level)
delay(1000); // wait for a second
digitalWrite(LED_BUILTIN, LOW); // turn the LED off by making the voltage LOW
delay(1000); // wait for a second
}
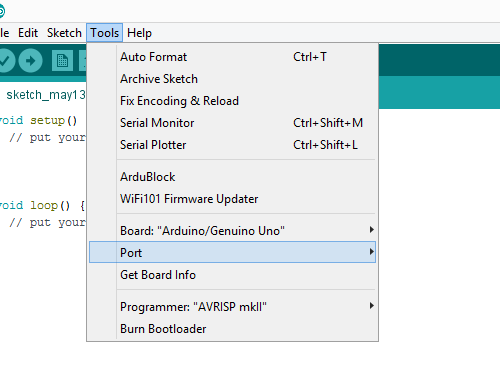
Now upload this code by clicking on upload button, but before that you need to make sure your board is connected properly, to check that go to Tools->Board-> and select your board like Arduino UNO here.
Again go to tools->port-> and select your port where Arduino is connected.
With that checked you can simply upload your code with upload button.
Now you should see your LED blinking in your breadboard and that means you are good to go.
One more important thing is that you may have to install CH340 drivers if your communication chip is CH340 In your Arduino, otherwise your windows will not detect its drivers, now to install those drivers you can simply go to https://sparks.gogo.co.nz/ch340.html
And download drivers for your machine. Install those drivers so that you can upload code to your Arduino.
CH340 drivers are only essential for boards with ch340 chip in it.
Now with that done lets jump to our second program.
Input from Sensors
This project covers how to take input from sensors using Arduino. The sensor that we are going to use will be IR sensor (infrared sensor) and we are going to take input from environment this time.
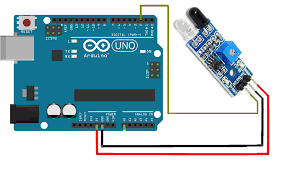
Connections will be simple, you can connect 3 pins of IR sensor as Vcc with 5V of Arduino , Gnd with GND of Arduino, Vout or Dout with digital pin of Arduino like here D2 or pin 2 of Arduino
Now with the connection done it is time for code, here is the sample code that you need.
Code For taking Sensor Input
Int A;
void setup()
{
pinMode(2,INPUT)
;
}
void loop()
{
A=digitalRead(2);
}
Code
This code above will take input from IR sensor, but we cant see output on our screen or anywhere else, so to watch our result lets learn how to communicate with Arduino directly via serial communication
We can write Serial.begin function to start serial communication in Arduino with our computer. Serial.print will print the commands on our screen, so with serial communication our code will look like:
Code
Int A;
void setup()
{
pinMode(2,INPUT)
;
Serial.begin(9600);
}
void loop()
{A=digitalRead(2);
Serial.println(A);
}
Code
Upload the code and that’s it !! upload this code and watch your results on serial monitor, press Control Shift M or this button on top right of your screen to watch the results, now you may able to see the reading of IR sensor on serial monitor, to read more about baud rates (9600) or serial communication you can visit:
Now change your code to Code Code To understand the code above you need to learn basic conditional statements, we have used IF condition that if there is input on digital pin 2 (true) then turn pin 13 High Or else if there is no input on digital pin 2, pin 13 should stay low. Now upload this code and see the results, your pin 13 (LED) should turn on when there is something in front of IR sensor, and stay low when there is nothing. Hopefully, these activities will help you in learning Arduino from the beginning. I will keep uploading more tutorials in this thread, you should practice these tasks first before moving forward, if you find anything confusing you can comment here or most importantly, keep trying. Download all resource files for Arduino Programming Course: https://drive.google.com/drive/folders/11MYTnf5k2kf3li389vJxB3lWvime8azC?usp=drive_link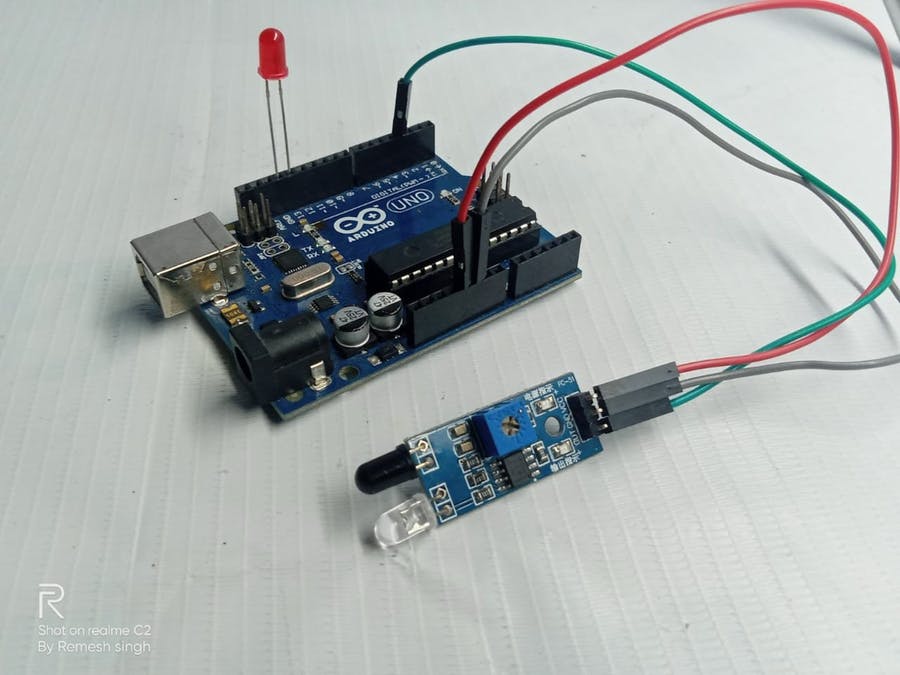
Int A;
void setup()
{
pinMode(2,INPUT);
pinMode(13,OUTPUT);
Serial.begin(9600);
}
void loop()
{A=digitalRead(2);
Serial.println(A);
If (digitalRead(2)){
digitalWrite(13,HIGH);}
If (!digitalRead(2))
{
digitalWrite(13,LOW);
}
}Best of luck and happy learning
Recommended for techies !!!
